Lesson 3: Working Through a Typical Job
Field Basics Course
- Lesson 1: Installing the TrackTrade App on Your Device
- Lesson 2: Logging in to TrackTrade
- Lesson 3: Working Through a Typical Job
Details between Jobs can change but the general flow will always be the same and that is what we want to highlight here by going through a typical Job and building your confidence in using TrackTrade.
A quick overview
Here's the general flow of steps you'll usually take when using TrackTrade:
- Open the app to see what Jobs you have.
- Choose which Job you are going to work next
- Travel to the address given for that Job
- Arrive on site
- Carry out the actual work, documenting relevant evidence as you go
- Mark the Job as complete
- Move on to a new Job or call it a day and 'Travel Home'
Pretty straightforward! Now let's see that process in action.
1: The TrackTrade home page
Now that we've got you logged in then opening the app will take you to your home page. We've kept things nice and simple here. You're here to do Jobs so that's what you see on opening the app, a nice list of all the Jobs currently assigned to you.

When you are not on an active Job then this home page is what you see when bringing up the app.
When you are on an active Job then you will only see that Job in detail and you will have to complete or suspend that Job to see your full list again.
There's a few ways to adjust your list of Jobs (Today or All Jobs buttons) and you can search through them if needed but the main thing here is the Jobs list itself. You can see all the key info at a glance in each Job card such as the Job description, site address and Customer contact details.
You may see more or less info here depending on what your office has filled in. If something important isn't here then you'll need to contact them.
Tapping View Job brings you to the Job Details page for you to review but to actually accept the Job then you can just tap the centre of the Job card itself so go ahead and do that.
2: Travel to the Job site
You've accepted this Job and are now considered to be travelling to the given Job site.
You will be presented with the Job Details page but most of the buttons and functionality is greyed out for now. They will activate after your travel is complete so don't worry about them for now.
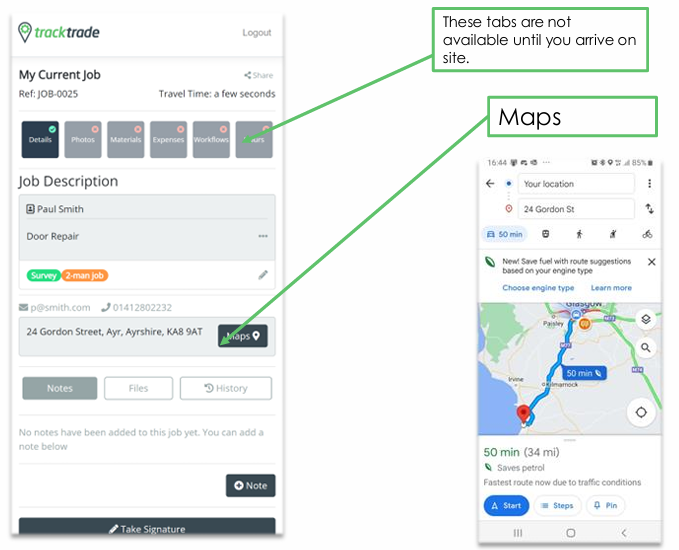
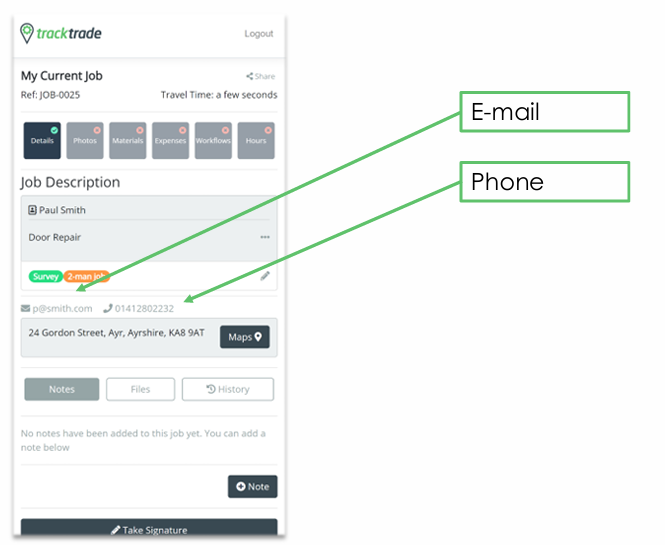
The destination address can be seen here and a Map button is provided which should bring you to your device's default gps/navigation app (e.g. Google Maps or Apple Maps). Customer contact information is available here as well should you need to reach out them at this stage and you can also tap these to quickly bring up your email or phone call app.
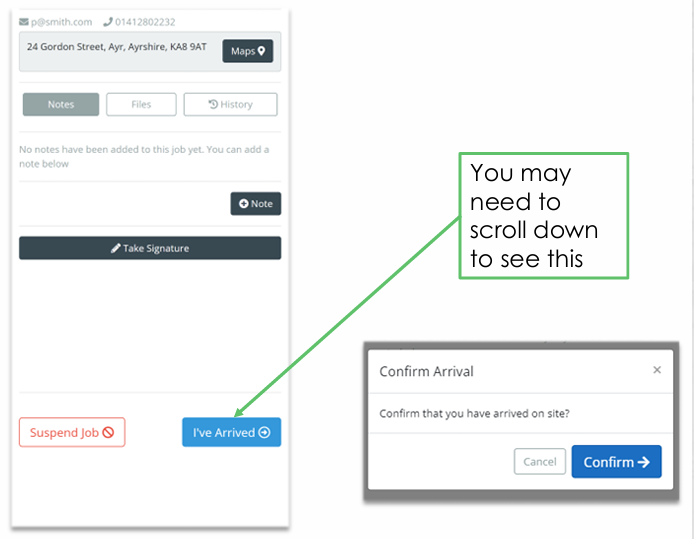
Once you've arrived at the Job site, simply hit 'I've Arrived' and then 'Confirm'.
3: On Site
Now that you're on site, those greyed out sections are now active so you are free to get on with the task at hand and use TrackTrade to record the evidence of your work as you go.
You might use every section or you might only use a few, it depends on what your office manager expects from you so reach out to them if you're not sure.
- Details - View job info, add notes, get signatures.
- Photos - Take before and after photos of the work.
- Materials - Add materials used.
- Expenses - Add your expenses.
- Workflows - Complete job-specific checklists.
- Hours - Record your hours for the Job.
4: Record your hours
No matter what other Job evidence you've collected, you will always want to finish up by entering in your hours worked.
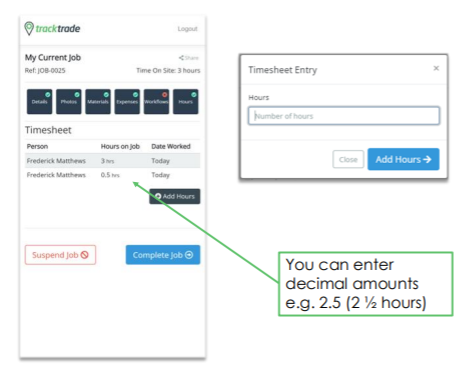
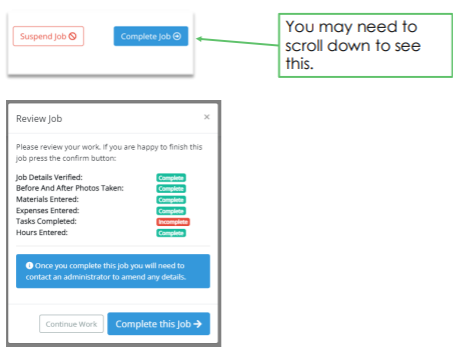
5: Complete the Job
Finalise the Job by selecting Complete Job and if you're happy with the summary provided then confirm it and you are done!
In this brief introductory course we've got you primed and ready to use TrackTrade out on site. You've got the app installed, you've logged in and now, in this final article, you've seen the basics of working through a Job.